


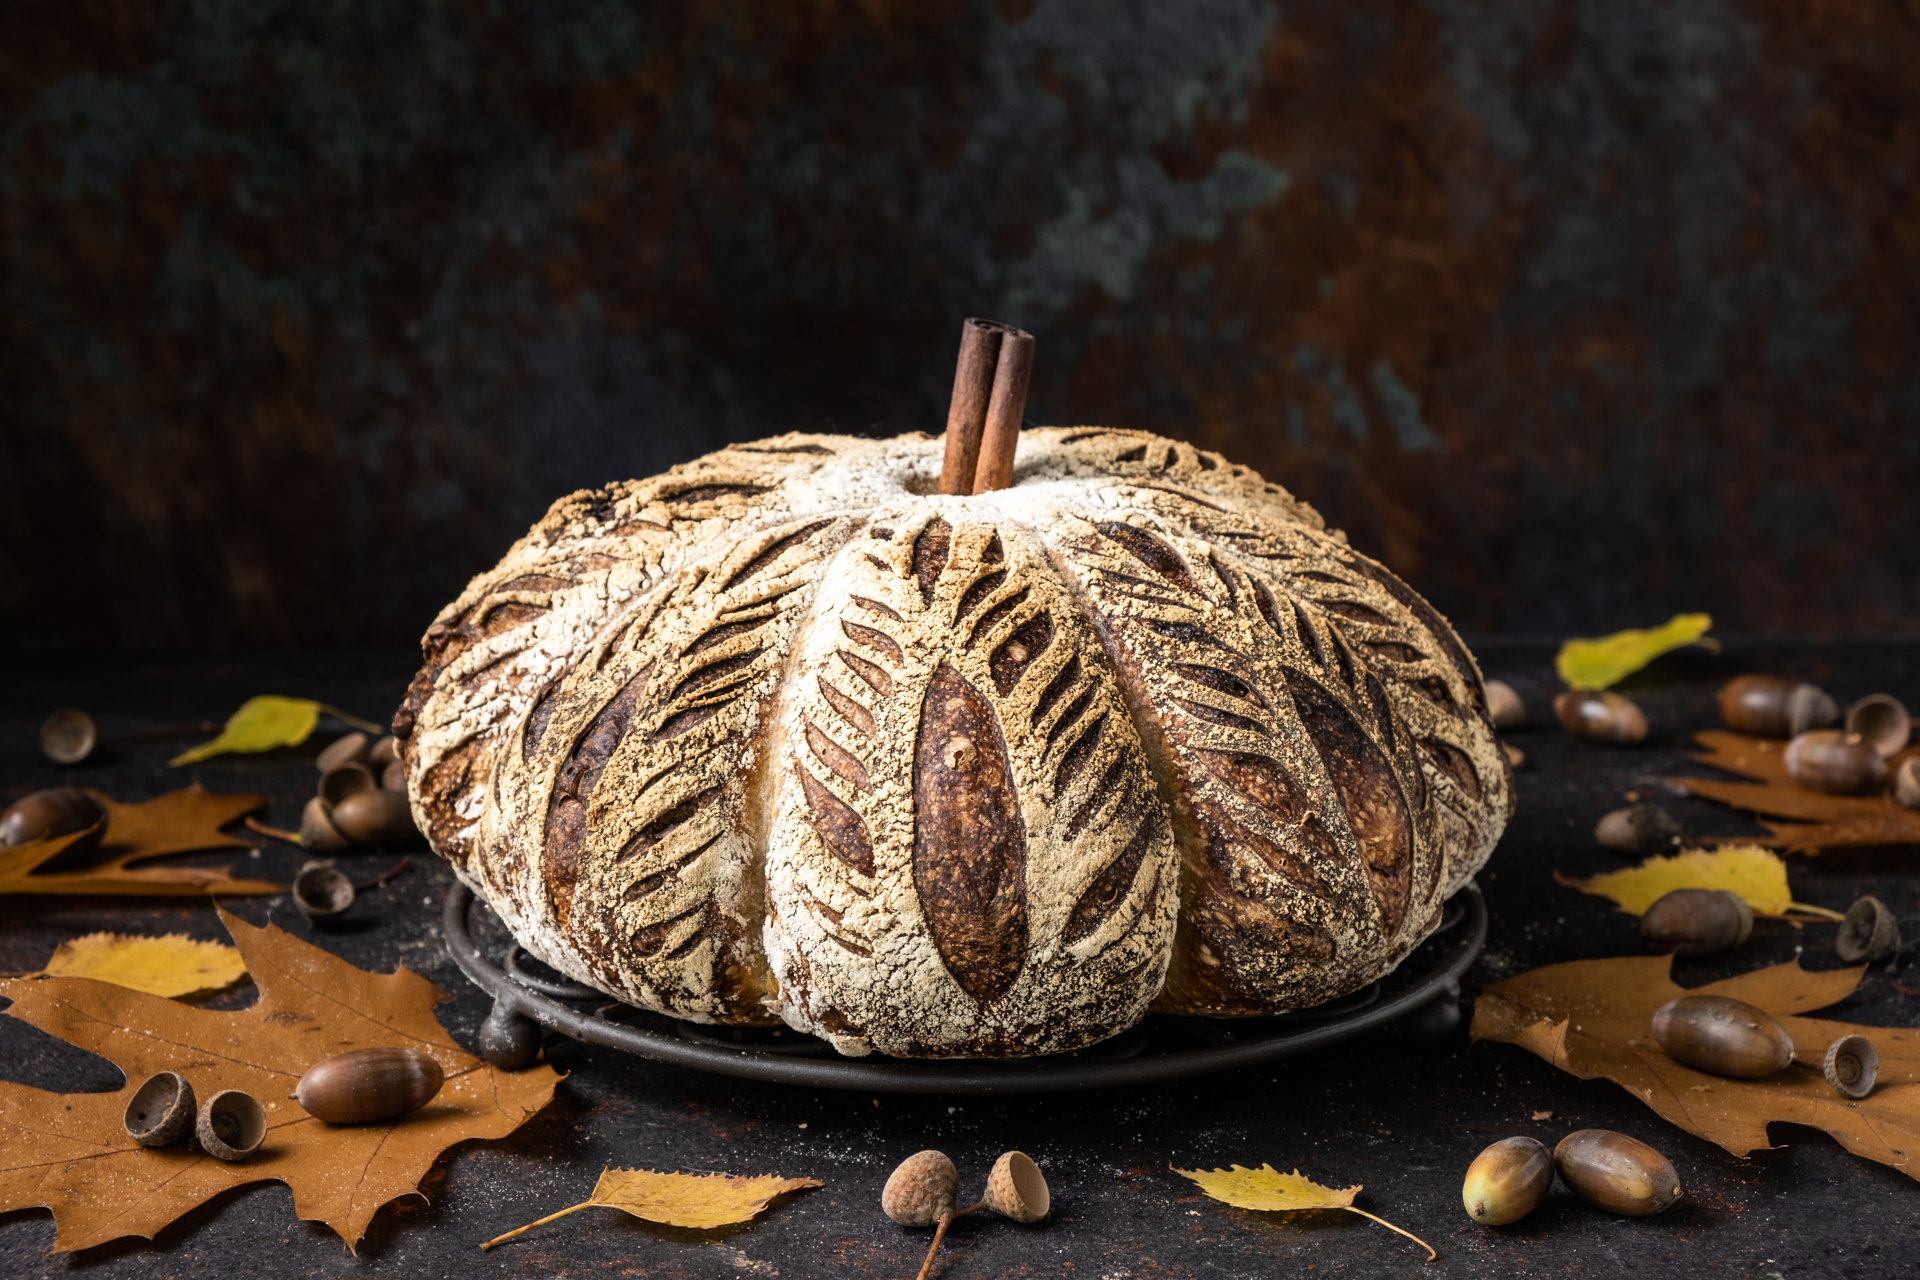
This is a recipe for a sourdough bread made with pumpkin puree and pumpkin seeds.
It is a very delicate bread, with soft crumb and combined aroma of pumpkin and cinnamon. It is not a cake but a delicious bread.

Ingredients:
- 590g strong wheat flour (14% protein)
- 100g spelt flour
- 100g rye flour
- 300g water
- 200g pumpkin juice (or just water)
- 150g sourdough at 100% hydration
- 15g salt
- 150g pumpkin puree
- 100g roasted pumpkin seeds
- 2 cinnamon sticks (only for decoration)

Directions:
- [Day 1, Saturday, 10:00] Scaling. Start by measuring the ingredients.
- Immediately after, Mix liquids (pumpkin juice + water) + flours. Mix only the flours with liquids just until well combined, usually it takes 1-2 minutes in the mixer. Do not knead at this stage, just insure there is no unincorporated dry flour resting in the bowl and that's it. I used a bread proofer to keep the temperature of the dough around 27ºC between the steps.
Cover the bowl with a lid to avoid the dough to dry at its surface. Leave the dough for the autolyse phase for 3 hours. - [Day 1, Saturday, 13:00] Sourdough starter. Add the starter over the dough and knead for 8 to 10 minutes with a standing mixer or by hand. Then, leave the dough to relax for 30 minutes.
- [Day 1, Saturday, 13:30] Salt. Incorporate the salt and knead for 5 minutes more in the standing mixer. Then cover the bowl and let the dough to relax for 30 minutes.
- [Day 1, Saturday, 14:00] Divide and Stretch and Fold. Take the dough out of the bowl, put it on the slightly wet table board and divide it in 2. Stretch and fold each piece on the board and place them in squared glass bowls. Let them sit covered for 30 minutes.
- [Day 1, Saturday, 14:30] Lamination. Take each piece out of the bowls and do the lamination. Now it is the moment to add the pumpkin puree and the pumpkin seeds between the layers of each dough. Let the dough rest covered for 1 hour.
- [Day 1, Saturday, 15:30] Coil fold 1. Do a coil fold, directly in the glass bowls (if the dough allows you). I only did half of it as the dough was stiff enough. Let them sit for 1 hour covered.
- [Day 1, Saturday, 16:30] Coil fold 2. Do a second set of coil folds in the glass bowls and let them sit for 1 hour covered
- [Day 1, Saturday, 17:30] Shape the loaves on the lightly floured board. Place the dough face down into well floured bannetons. Repeat the proces for the second piece of dough. Let the covered bannetons still rest at room temperature for 1 hour before placing them in the fridge for 15 hours. This timing doesn't have to be exact. They can stay in the fridge between 14-20 hours without being overproved. Just be sure of the temperature inside your fridge to be around 4-5ºC.
- [Day 2, Sunday, 8:30] Score. Before scoring you need to heat the oven with one or 2 Dutch ovens inside until it reaches to 270ºC. This usually takes about 30-45 minutes.
Take the dough out from the fridge and reverse the banneton on a baking paper. Tie the cords to look like a pumpkin, score the bread with nice decorations and add a cinnamon stick in the middle of the bread. Put the lid on and immediately after, put the pans into the oven. - Bake in the preheated oven at 270ºC for 15 minutes. After these 15 minutes, reduce the temperature to 220ºC, remove the Dutch oven lids and continue to bake for 30 minutes.
- [Day 2, Sunday, 9:15] Cool. The bread needs to cool for at least 2 hours until it reaches the room temperature. The cooking process continues slowly even after taking the bread out of the oven, so this is why it is important to not skip this step and to resist cutting it too early. If you can, of course. Remove the cords from the breads.
- [Day 2, Sunday, 11:15] Cut. Now is the big moment to see the crumb after cutting. Can you resist tasting it?


Enjoy the beautiful days of autumn !

0 comments:
Post a Comment