
RSS

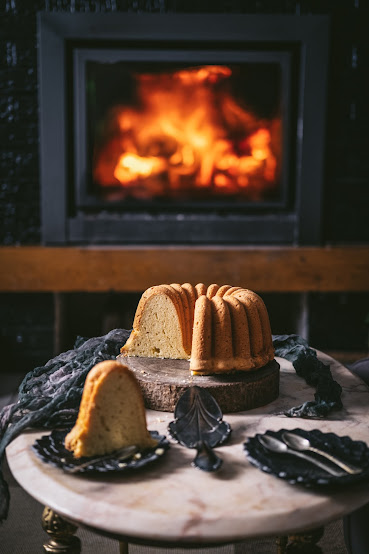
Simple Bundt Cake

I feel starting a new personal challenge with baking cakes. 

I bought a beautiful bundt recipe book and I was so excited to start baking from it. The first recipe was weird. The balance of ingredients was so incorrect and instead of a batter, I ended up with a dough. I adjusted the recipe on the fly and of course, I did not end up with the best result. The second recipe was the same. The third one, the same. It was then that I seriously asked myself what is wrong? Was it the book or was it me or my type ingredients?

One of the things I always do from most of the recipes is to cut the sugar. And this book was so generous in sugar. As a general rule, I keep the sugar in a cake to 100-150g, except for the ones where the sugar makes the structure (like for meringues, macarons). Even if I have a sweet tooth, I do this for a good reason, to reduce the general intake of sugar for me and my family. For me, I trained myself over time to eat less sugar and this had only good benefits. My taste has changed and I can really enjoy a cake with less sugar while finding the ones with too much sugar impossible to eat more than one bite. For my family things are similar. My husband was never fond of sugar, he prefers fresh fruits over cakes by far but for my kids, things were different. They love everything sweet, very sweet. And sweets are everywhere: at school, at an anniversary, with any treat, with any Christmas or Easter celebration. However, there is a daily snack that I prepare myself for them. Usually, this is a homemade bisquit, a cake, a cupcake a waffle or a savoury snack. I could buy this one for sure but I choose not to. Why? Because I would like at least for this daily treat, to control the amount of sugar they eat. This is actually why I bake every single week something sweet. Most of my cakes are without glaze because it would be difficult to transport them at school and eat it in a clean manner,

Coming back to my bundt book, with the last bundt cake I published on instagram I was complaining about my frustration with these recipes. One commenter left me a message that by adjusting the sugar quantity I might modify the structure of the cake. I had a wow moment, how could I have not thought of this before? Could sugar have much more importance in the structure of the cake? Incredibly how a dropped comment had opened up a new world to me. She is an angel sent to me at the right time.

I started then to make research,  lots of them, to understand how I can balance back a recipe by reducing the amount of sugar. I even looked at Harvard research... it's crazy... but this is pure baking science. How I couldn't think of this before for cakes, especially since I was baking with science for bread. The answer is probably simple.... because every day we make new connections in our brains and we learn something new. So happy to arrive here!

But the story didn't end here. Yesterday, I was wondering what others were commenting about the bundt cake book. I went on the web and the Aha! moment was there. The book was giving the recipes in 2 measurements: cups and millilitres/grams. As I like to be very precise, I always bake by grams. I found some comments mentioning that the ingredients in cups were OK but the ones in grammes were completely off. I found the culprit of my failures and is such a shame for a published book. Wouldn't you expect that when you buy a book the recipes are tested over and over again? Well ... dream on... not every book author is Julia Child.

For this recipe, I started with the first simple bundt cake, a pound cake. Pound cake has equal quantities of flour, sugar, fat and eggs. Nice cake but the sugar is way too much for me, so I started adjusting.

The original recipe was calling for 375g of sugar, way too much for me. I cut it to 200g and still, I can say it is too sweet for my taste. I had then to balance my reduction with some liquid, so I added milk and yes, I ended up with a batter, not a dough.

The cake ended up beautifully although I think there is still room to be even more fluffy. My challenge continues and with my next cakes, I'll add some baking science findings too...


Two versions of pickles: sweet or healthy


Pickles in Romania are like national food. There is no traditional housewife without a pantry full of jars of pickles. The shapes, the colours, the arrangements into jars go to an artistic level and displaying these jars can also be part of the house decoration. What is amazing is that every family has its own recipe and use their preferred vegetables/fruits.

The original idea of making pickles has a good base. Our grandmothers didn't have the luxury we experience today to find tomatoes in January at the supermarket and either to have a fridge. Fruits and vegetables were coming fresh with warm seasons and by the end of the autumn, they were gone. But people needed fruits and vegetables over the cold season as the meat was not an everyday food. So, they found a way to preserve fruits and vegetables for a long period and enjoy them also in the winter and early spring.
One option that my grandma was using, was to preserve tomatoes in big pots of salt. I bet not many of you are aware of this method. But the most popular method was through fermentation. They didn't have jar glasses back then, they were using ceramic big pots (that are even better than glass jars by the way).

When I was living in Romania, this food was on every table, in any house. It was such a common food that it was not raising any interest to me anymore. But when I moved to Belgium, I started to miss them. I tried to buy them but the taste was different from what I knew. I had then to learn to do them myself to get back the taste I knew from childhood.
One of my preferred pickles was "gogognele". They are nothing else than pickled green tomatoes harvested when they are unripe. There was no way that I could find them in a Belgium market as was the case in the Romanian food market. So, I almost gave up on the idea and stick to what was easily available: cauliflower, carrots, celery. But 2020 was a very productive year for tomatoes and by October, my tomato plants still had a lot of unripe cherry tomatoes hanging. It was the perfect moment to transform them into pickles. I called my mother and asked for 2 recipes: one with sugar, one without. Why 2? Because I knew the ones with sugar were tastier but the ones with only salt were super healthy.
I made 2 versions to have a direct comparison. The first 2 photos of this post are made back in October 2020, which is almost one and a half years ago. After making them, I noted down the recipes and waited for the right time to write this post. But there was no right time until I realised that there were only 3 jars left in the pantry and soon I wouldn't have been able to photograph the finished product as they would have been fully eaten. Yes, I made a lot of different jars back then with all sorts of vegetables and we ate them slowly because during the summer and autumn I prefer fresh vegetables to accompany a stake.


Difference between pickles with only salt version and the ones with vinegar and sugar version
The 2 versions were important to me to compare the taste but there was no doubt which one I should choose for health reasons.
The pickles made with salt only are having incomparable healthy benefits. The ones made with vinegar and sugar have a different process (chemically speaking) and do not reach the health benefits that the other version has.
In the salt only version, the pickled vegetables/fruits preserve the quantity and quality of antioxidants (like vitamin C, betacaroten etc.), they are an important source of vitamins (A, B1, B2, C, E, K) and minerals (iron, magnesium, calcium, potassium). They contain probiotic bacteria that help the digestive system by feeding the microbiome so important to our body immunity and health. These are natural antibiotics and prevents cancer. They reduce the allergies and inflammations inside the body. They are also suitable for a diet, as they are low in calories.
All these are so well fit in the winter to help you avoid catching a cold and to keep you healthy. Our grandparents had no idea about all these health benefits discovered lately by studies but they were avid consumers of the pickles over the cold season.
Looks like miracle food right? Well, it is, but there is one case though when you have to avoid them and that is if your doctor recommended you to minimise the consumption of salt.

Now let me tell you my conclusions after making the 2 versions. The ones with sugar are having a sweet flavour that makes them more appealing. The ones with only salt, I expected to be more salty than sour, but I was wrong. Both were sour with a delicious taste with just the sweet flavour as a difference. I liked them both and I will do them again for sure. Which version? Definitely the one with salt only. Why? Because of the unmeasurable benefits the naturally fermented food has for our bodies. In the end, even if the sweet flavour is missing in the salt version, the taste is not that different.

Before ending, if you plan to make your own pickles, let me give you some tips and tricks to keep in mind:
  • make then in the autumn, September and October are perfect to have them fermented in the early winter.
  • pick healthy vegetables/fruits, preferably hard type not soft. Root vegetables are perfect!
  • Do not throw away the leftover brine (only for the salt version) after eating the pickles, it can be used for souring soups. The salty brine from cabbage is very popular among Romanians to consume after a long drinking night as it will reduce the hangover symptoms.

La Couronne Lyonnaise / The Lyon Crown Sourdough Bread

I continue the adventure with traditional French loaves and I travel from Bordeaux (in one of my previous posts) to Lyon. Similar flower look but with a different way of shaping it. Wich one do you like better? I think each one has its own charm, so for me is difficult to choose.

Like the previous one, the dough is made by a number of dough balls arranged in a circle in the basket. Both Bordeaux and Lyon versions have a flap. For the Bordeaux version, one of the balls is flattened and the dough balls are put over. In the case of the Lyon version, a flap is created for each ball of dough. This version has a more petal look and the other one is more of a circle that is rising in the oven. Both of them are outstanding in terms of design and I can only thank the French to invent these amazing loaves.

Like the other crown bread, this one is traditionally based on sourdough and made from white flour combined with a bit of rye flour. The crust is crunchy, the crumb is dense but soft and this is the way is traditionally made. The dough needs to be stiff to keep the shapes of the balls. The bread is straight, meaning that there is no overnight retard, for the same shape reasons. 

I visited Lyon more than 20 years ago and unfortunately, I was not aware back then of this fantastic bread. If I have the chance to visit again this beautiful town, trying this local bread would be one of the first things to do.

Multigrain Sourdough Bread

I know that Christmas is gone already for 1 month but this bake was too interesting to wait for the next Christmas to post.

I bought this flour by mistake. I confused the classic bread flour package that I buy from the supermarket (that I use for cakes by the way, because its protein content is 10%) with this one. I have not noticed that the picture on the package showed some grains. Neither I read the title...
But well, I arrived home with 5kg of multigrain bread flour. When I try a new flour, I always test it first at 70% hydration: that is not too wet not too stiff, perfect hydration to compare. The protein of this flour was 13%, but not to be tricked... this was the protein content of flour + grains, so the flour should have had about 10-11%.

Would I buy this flour again intentionally? Probably not. I do not like the mix of seeds in the flour, I prefer to be able to select what seeds I put in my bread and in what quantity. More, I usually add the seeds in the lamination so this flour does not fit my process and starting to sift the seeds out of the flour does not seem efficient to me.

However, the dough behaved well, but with this new flour I wanted to take as much measurements with my new toy, the PH meter. Sometimes, I measure before the steps and after to understand the changes. You can find the numbers in the directions section for each step.

Conclusions of the measurements experience:
  1. the dough heats up slowly after the mix with a standing mixer
  2. every manipulation of the dough outside the bread proofer affects the dough temperature (like when put on the board, shaped etc)
  3. putting the bread into the fridge when the ph was 4.18 was a good decision
  4. my fridge had a higher temperature than the set (5ºC) as the dough before scoring got a temperature of 9ºC. This variance needs to be considered in order to avoid over proofing the dough in the fridge!

La Couronne Bordelaise / Bordeaux Crown Sourdough Bread


I wanted to try this loaf from the moment I first saw it. I though to be a complicated one but I manage to get it from the first attempt. The special thing about this bread is not the crumb, not the rise but the shape. It is about rising a thin piece of dough on top of the bread to achieve the look of a crown.
This bread is called La couronne bordelaise (translated as the Crown of Bordeaux) and of course, it is a French regional bread that you will for sure remember. 
The crumb is expected to be dense and soft with a crunchy crumb, especially the "crown" part. 
When raising in the oven, to me it looked like a blooming flower, such an impressive sequence to see in a speed up video.
The look of this bread is simply wow. It has a simple recipe, traditionally made with white flour and a small part of rye or whole wheat. It is also traditional that this bread is based on sourdough.
The stencil decoration of this bread is optional, but I think it gives a big effect to the final look of the loaf.

To see how I made it, the best is to watch the video. If a photo says a thousands words, a video says a million.

I introduce now a new thing in my baking because this Christmas, Santa came to me with a geeky tool, a PH meter. Since then, I started to test the dough at every step and note everything down. I've read a lot about baking based on the PH rather than the volume increase in an aliquot jar or by eye and currently, I am in the learning process with this new toy. As soon I will have some conclusions I'll happily share them with you. But so far, I experiment. That's why, I included in the recipes some notes, and here it is how they need to be read: PH - the PH of the dough measured before the step. DT: the dough temperature at the time of the measurement. (eg:[PH:4.54; DT:23.8ºC])

One first lesson I learned is that the temperature that I set for my bread proofer is usually higher than the dough temperature. It is not an unexpected discovery, I measured the dough temperature before and I knew that. But this time, I have measurements at each step. It is interesting to see how the temperature fluctuates through different steps because of the dough manipulation at room temperature (usually 20-21ºC during the cold seasons). 

This loaf I baked it when the PH was 4.2. Seeing the crumb, I feel it could have been proofed more. No, this bread is not underproved because the crumb should be on purpose closed and soft. Then, due to the particularities of this bread of rising the disk on top of the bread, staying close to the under proofing limit, I think it is a good idea. But I will test this assumption with my next loaf.

I still have much to learn about PH, and for the moment I just keep track of the measurements and make notes.


Turmeric Marbled Sourdough Bread

There was a type of bread that I wanted to bake and it was  time to try it. The marbled bread.
This bread has the particularity that the crumb has swirls of colours coming from combined dough with different colours. The recipe is a classic one, with a high hydration dough to get a more open crumb. It is just about colouring a part of the dough (preferably in a healthy way) and layering it over the rest of the dough in the lamination phase to obtain a distinct combination of colours. The swirls come from the manipulation of dough after the lamination, more exactly during the coil folds. There is a trick about them and I will explain.
For these loaves, I used turmeric as food colouring and this one has the tendency to tint the rest of the dough as well. To avoid this, it is better to keep the coloured dough in a smaller proportion than the white one, that will be about 25-35% from the total dough. Then, I performed 3 coil folds during the bulk fermentation, after I integrating the 2 coloured pieces of dough. More than 3 would make the crumb completely yellow. Two coil folds would be better in order to see the distinct swirls but you'll lose on the bread structure side as the hydration of this dough is high. So, 2-3 coil folds are the right number, but also be careful when you perform the coil folds themselves to avoid doing it multiple times. Keep the movements simple and do not overdo it.
All the rest of the steps are exactly the same as for a classic sourdough bread.


This bread is more about the visual aspect of the crumb rather than the taste or bread fermentation technicalities. I find that the turmeric addition did not changed the overall taste of the bread so this ingredient is kind of neutral for the taste. 
To get the open crumb, I recommend fermenting the dough up until the aliquot jar indicates 100% volume increase.
I invite you to watch the video above for all the detailed steps of this recipe and method of making bread.

Enjoy!

Cheese turnovers with discarded sourdough


I have done these turnovers in many ways and my children are crazy about them. In French they are called "chaussons". Usually I do not use a special turnover mould and I do them manually, by packing the cheese inside like in an envelope. Then, I bake them using a sandwich machine.
But these ones, I wanted to be more good-looking and I used a butterfly mould forgotten on a top shelf of my pantry. 
This is a great way to get rid of a big quantity of discarded sourdough. They taste so well in combination with the feta cheese and, although I have not tried other types of cheese, I think it would taste great too if you replace the feta with some melting cheese inside.
They are super easy to make and I warn you, they fly super fast from the plate.
Enjoy!

Christmas Savoury Tart

I made this tart really in a hurry and because I had broccoli and zucchini sitting in my fridge. You do not have to follow fancy recipes and buy dedicated ingredients. Sometimes, it is enough to throw into a tart whatever ingredients you have available in the fridge. Just be carefully to combine them wisely to obtain a dedicated taste.

Here you have a little video about how I made this tart.


Black Sesame Sourdough Bread


Making sourdough bread is such a rewarding activity even if you make it just as a hobby. I know many of you are making sourdough because of its health benefits but the pleasure to do it, to put your hands in dough, to watch it growing during the proofing, to score it or stencilling it, to wait in front of your oven watching it blooming and then waiting impatiently for it to cool before taking a bite is another level of accomplishment. Baking and cooking, in general, could be seen as such a witchcraft: combine individual ingredients in a certain way in a pot, baking it and coming up with a gorgeous result that taste heavenly, isn't this looking like a sorcery? Just kidding, let's put the feet on the floor and talk about this bread.

Though, there is something magic about this bread and its about the combination of sourdough with seeds. The seeds bring a nutty flavour that combined with the mild sourness of the sourdough bread are making from this bread an exceptionally tasty one.

I found this recipe being close to perfection in terms of taste and crumb, however the dough handling is not for a beginner. The dough is wet and the addition of rye and spelt makes the dough sticky. I do not want to discourage you from making this recipe but I want you to be prepared about what kind of dough to expect. Having a bit of skills in reading and handling the dough will definitely help and reach you to success from the first attempt.

I did this recipe 4 times in a row, to test changing little variables, to observe the results. Some changes were good, some were less good. Now I can conclude that my perfect formula for this recipe is: 10% rye, 10% spelt (the rest strong bread flour), 77% hydration and 70% dough increase (in the aliquot jar) before the fridge retard.

Here they are, 2 fantastic loaves. You'll hardly see an ear for this loaf (I've got half of an ear twice from 8 loaves) but the crumb.... oh this crumb looks to me perfect. Opened at the perfect size, not over open crumb, and for sure not a dense one. This is for me the crumb to satisfy all the wishes. 


Chocolate Sourdough Bundt Bread


I recently discovered baking sourdough bundt breads (or cakes if you prefer to call them like this) made only with sourdough without using any baking powder, baking soda or yeast.

Beside the evident health benefit, there is something that I love about this type of cake. With sourdough you know for sure that your cake will rise as you will see it before putting it in the oven, With baking powder, if you picked a good recipe you have some chances to see it rising but do not be surprised if some are not.

The first recipe I developed in this way was made following more or less the steps I usually do for classic sourdough bread. I had a successful recipe last time but I was wondering if I cannot simplify it even more. What if I would add all ingredients at once, without having to add them in steps at a certain interval? I was not looking for developing a structure as I would do for classic bread because I bake in a pan.

Bundt pans are having the advantage of having a central element (that creates the hole of the bundt cake) that ensures that the cake is baked evenly also in the center. That said, I didn't need an extra structure, so no folding, no extra gluten development, no lamination needed and no shaping needed. So why not put the batter straight into the pan? I told myself it was worth a try.

Then, sourdough needs time to grow. It took me about 5 hours to see it growing and I put it in the fridge as it was too late in the evening to bake it directly. If you want to bake it directly, I would recommend to add maybe another extra hour for proofing because mine it continued to rise in the fridge. By morning, it reached the level of the pan and had also a bump that overpassed it.

In the oven, it rose even more, but it didn't go down over the borders, it rose up keeping the shape of the pan.

I made this recipe with very little sugar and it resembles to a light sweet bread with profound chocolate taste. You might want to extend the sweetness by adding more sugar, but I preferred to keep it also in a healthier version.

I used stiff sourdough at 50% hydration because I wanted to avoid any sour taste for a sweet bread, but I do not think the taste would have been completely changed if with a starter at 100% hydration. Maybe I will try this one day.

Regarding the hydration of the dough/batter, I found that there should be a balance. Make a simple ratio between the wet ingredients and the dry ingredients (excluding the sugar/jam etc) and if you are staying in 1.3 - 1.4 there should be no issue with this bread rising nicely. This ratio can be translated into 130% to 140% hydration but special ingredients like eggs, yogurt, oil cannot be considered as containing only water. There are other elements in there, like proteins, fats that cannot be counted as water. But keep this ratio in mind and then, you can make convert any bundt cake recipe based on baking powder into a bundt bread with sourdough .

This is a really simple sourdough recipe for a light sweet bread. If it looks nice to you, give it a try and let me know what you think about it.