RSS

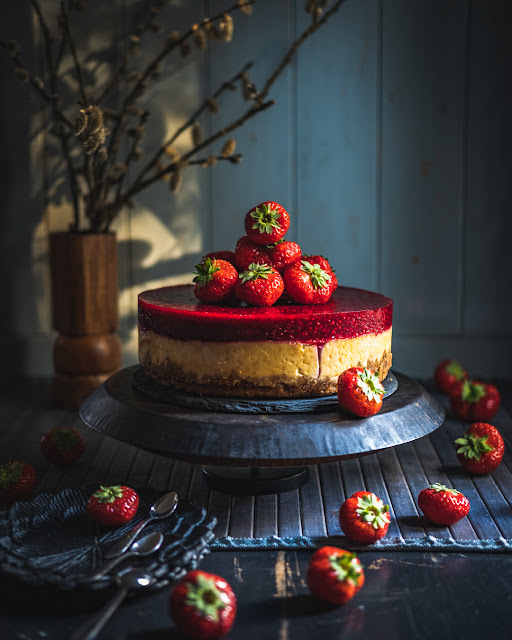
Red Berry Cheesecake in Instant Pot

I do not know why, but I was always afraid of cheesecakes. Not to eat them but to make them. They crack, they are runny sometimes, and there are multiple ways you can get it wrong with a cheesecake. Well, the Instant Pot opened a door for me. I hated the classical way of putting water on a tray and putting the pan inside a classical oven. What if the pan is not leakproof? Then, handling a hot water tray is not very pleasant. With the Instant Pot, things are simpler and with fewer negative surprises. But this is not a commercial post for the Instant Pot, it is just my opinion. You can definitely bake this cake in a normal oven, too.

I made this cake in 2 versions, one including milk (or sour cream) and one without. The first one leads to a more creamy texture and the second one is more crumbly. The first one is soft, and the second is drier. I liked them both but my daughter detests cream texture in any cake. You can guess then which one was her favourite. 

You can do this cake without the fruity layer but it adds a full dimension to the taste of this cake. The first version I made was with strawberries, and the second was with raspberries. Both are exceptional and red berries are just an idea, you can use any fruit you want!

Sugar in this cake is kept to a minimum but it is just enough to enhance the taste of the cake. If you prefer very sweet cakes, feel free to add as much sugar as you like. Personally, I like cakes but I also like to stay on the healthy side of eating. Most of the time I do not eat the cakes that I make, they are for my kids but if I really want to eat a slice I would choose one that is the most appealing to me and this one was irresistible.

I hope you will like it too...

Instant Pot Cranberries Yoghurt Cake

I love baking in general, but steaming was not necessarily my daily way of cooking. I challenged myself to try pressure cooking lately and a whole new world opened to me. In fact, cooking with pressure was not a new thing for me. My mother gave me a big pressure cooker pot as a present at my wedding. I need to recognise it was a love and hate relationship... I was using it for a while then it was staying for months on the shelf. Now that I think back, I think the main reason was the practicality of that pot.
So, two lovely ladies told me about their experience with the Instant Pot and I convinced myself I want to try it. I can say it was a real turning point in how I am preparing my daily meals. In a short description: healthier and faster. I added as well to my family meals new dishes that looked so complicated before. Now everything happens in one pot...
I love to explore, to test the limits and I tried to bake cakes in it also. I understood what works in it and what is not. Instant Pot cooks with steam and moist types of cakes are appropriate. I baked a classic bundt and turned out OK but it was too dense for my taste. Then, I tried a creme caramel and worked perfectly. This time I made the yoghurt cake with a recipe from my mother. Of course, I had to adapt certain things but I am happy with the result.
This type of cake is usually baked in the oven between filo pastry sheets. I used a biscuit layer instead. I replaced raisins with dried cranberries (to be more accurate I think the ones that I have are actually lingonberries - in French is "airelles", please correct me if I am wrong).
What I love about it is that it is super simple to make it and it is firm enough to keep a slice on your hand and walk away. I gave it also to my kids at school as a snack.
You can play with some decorations and it will look as fancy as you wish.
If you do not have dried cranberries, use raisins or any dried fruits. I haven't tested but I think it works perfectly with fresh berries also. Good idea, I must try this too, could be very interesting.
This cake can be called a pudding. It works with the same principles, a cereal that expends in a diary liquid. What is special though is that I use homemade yoghurt, not milk. Almond essence and lemon zest give a specific and fantastic aroma to this cake.
It will for sure enter into my regular bakes due to its simplicity and delicious taste.

Here are the ingredients...

Rhubarb tart


Last spring, I've bought from the weekend market a little plant of rhubarb. It was a small plant and the guy selling it to me has warned me that it could grow up to 1m in diameter. All OK for me, I planted it in my garden and started to grow: unexpectedly big up to 2m in diameter at least. I knew that in the first year I better not harvested it, so I waited calmly for this year to come to taste it. Over the winter, it almost completely dried and I thought I lost it. But when this spring came, it was growing again at least as big as last year. This time... I had in mind a tart and now was the right moment.
A simple tart but with a lot of new things for me. First, it was about baking something with my own grown rhubarb. Second, it was my first tart baked in the wood-fired oven. None of these I've done before. The oven was low in temperature after a previous bake so I can almost say I did a slow bake. It started somewhere at 190ºC and went quickly a bit lower than 130ºC. I can call it a slow cook almost as it took about 3-4 hours to finish it and that with the tart shell already pre-cooked.
I was expecting the stalks to be redder but the lack of sun and good weather of this year had for sure an impact. Nevertheless, I had to try it!
The tart was incredibly well received by my daughter who enjoyed the sweet-sour taste of it and she commented that remembers the three kings' cake. Of course it does, as the filling is very similar to that cake, being based on almond powder. Just when it was gone I realised that I did not save a piece for me to try. Well, the plant is still there with big leaves but I won't dare to cut more stalks to not kill the plant. So for me, the next attempt to taste it will be next year.
Here is the simple recipe.

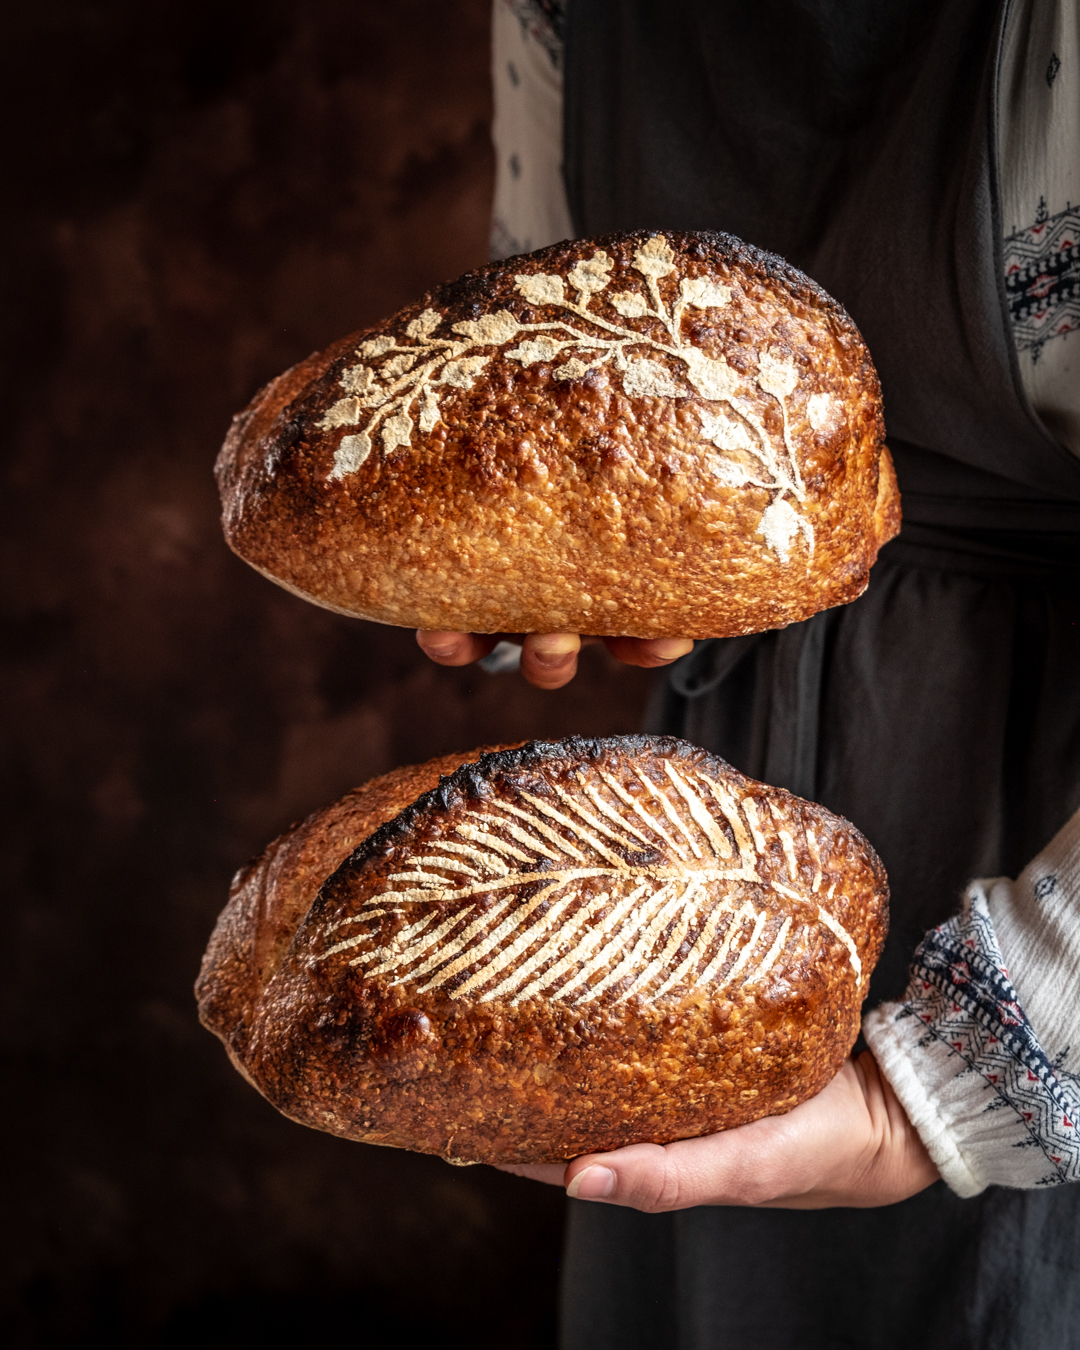
Rye - Whole Wheat Sourdough Bread


Take a bread recipe, make it until you are satisfied with the result and then you can play changing the flour. This is what I am doing with this recipe: I changed the spelt flour with rye flour in my previous recipe. The result may have the same look but there are big changes to the dough and I'll explain why. 
The spelt flour makes the dough very elastic while rye is fermenting faster. Rye flour is also more absorbent (at least mine because it is partially whole rye).
So, the spelt version needed more coil folds to build the structure while rye has already a good structure feeling stiffer. Fermentation time was reduced also.

If the aspect is similar, the taste is slightly changed. Rye flour comes with a more rustic taste while spelt has sweeter influences. Do I like one more than the other... hmmm... difficult to say. They are both sourdough bread and the taste is amazing in both cases. The differences are just a matter of nuances.


Here you can find the recipe:

Spelt - Whole Wheat Sourdough Bread

 When you make a dough combining multiple types of flours you should be very careful about the effect each dough has. Usually, if you put a type of flour in a percentage lower than 10%, the influence is minimal in the dough consistency and mild in the taste. When you increase this percentage, the characteristics of this specific flour start to be noticed. 

I made this bread with 3 types of flour: whole wheat, spelt and bread flour. Whole wheat is more absorbent and impedes the gluten network to develop easily. That's why a trick is to hydrate the whole wheat flour the day before so that the bran is softened through better hydration. The spelt flour adds elasticity to the dough. This means that you can stretch it more. The extensibility of the dough then has to be created by adding an extra coil fold. (the 4th one). The bread flour I used, although with 13% protein content was also very extensible and less absorbent than others I normally use. With these characteristics, making this bread is tricky.

First time I tried it I was not very happy with its dough structure and I over fermented it. The bread was perfectly eatable but for sure, was not what I expected it to be.

With the lessons learned from this first failed attempt, I focused on improving 2 things: dough handling and reduced fermentation time while keeping the list and quantity of ingredients exactly the same. To build a better structure, I added a 4th coil fold. For the fermentation, I definitely understood that this combination of flours, had to have a higher ph than 4.15 (as my previous test was). I shaped it then at ph 4.33 and put it in the fridge at 4.25. Only these 2 changes transformed a recipe from zero to hero.

This is a perfect example of improving the method and not changing the ingredients or their quantity. The method matters! There are many methods out there that make fantastic loaves of bread but you need to master yours and know the implications of changing it.

Chocolate festive cake


Chocolate festive cake


This was the cake for my husband's birthday last week. It was also the test cake for my son's birthday cakes. All the 3 followed the same principles, one sponge cake cut into layers with chocolate ganache between them. Similar compositions and tastes but three different looks. You may find the ones of my son in my previous 2 posts. 


Every cake had a different target: this one to look more festive, the "5" cake to be a child's cake and the last one to be easily transported. Which one do I like the best? Difficult to say as I associated them with special occasions. Doing all of them in one week was a marathon but with every challenge like this comes a lot of lessons learned.


The first lesson learned was to master the sponge cake both in cocoa or classic versions. Learning its tricks took me sometime over the years and now I can happily say that I feel comfortable baking them.


A second lesson learned was to play with ganache. This thing is super sensitive to temperature and depending on the purpose you might want a thicker or thinner texture. I found myself putting the bowl sometimes in the microwave to heat it a bit and sometimes in the fridge to cool it. It is however the easiest cake filling that you can do (after the basic whipped cream of course). I like simple things for basic staff and focus more on the artistic part of it.

You may find the complete recipe for this cake below.

Race cake


This was the anniversary birthday cake of my son. It took me a lot of time to prepare it and even more to make all the decorations. do I regret spending so much time on just a cake? Not even a minute. I made it with all my heart and I would do it again if needed.

I divided the making of this cake over 2 days: on the first day, I baked the sponge cakes and prepared the ganache, on the second day I shaped and layered them and prepared all the decorations.

The decorations took me almost a full day and I was helped by the little one, placing the big white and black squares on the side. My daughter participated also in the decoration process so it looked more like a family cake.

But a good cake doesn't only have to look nice it also needs to taste good. The combination of cocoa sponge cake and chocolate ganache is heaven. The guests appreciated the cake to be light, not overly sweet and delicious. The kids invited to the party loved it too, as most of the plates I cleaned up after were empty.

I was very careful with the sugar on this cake. There is a huuuuge (for me at least) amount of sugar paste (~750g) to cover the cake. The sponge cakes have 200g of sugar each, but I used only 1.5 sponge cakes, so I can make a total of 300g. There is also a good quantity of sugar in chocolate and there is no need to add more. Then another 100g for the syrup. If you start counting, the sugar sums up, however, remember that chocolate in its pure state is bitter and children do not love it like that. So a certain amount of sugar in this cake is a must. The trick was to find the right balance and I can happily say it was perfect.


Chocolate coated bundt cake

Last week it was a marathon of cake baking for me. With 2 anniversaries in the family, I managed to bake 4 sponge cakes for 3 finished festive cakes. It was a successful challenge and, as the time was so short, there was no place for tests or failures.
I went with the version of the cake that I master the best: the sponge cakes. The one you see in this post is the last one, made for the anniversary of my son at the school. It might look simple but is not. Basically, it is a sponge cake with the bottom cut in through the centre of the cake to introduce a chocolate filling, then covered back with the removed parts of the cake. The glaze was practically painted with warm chocolate ganache, as it was too thick to reveal the beautiful shape of this bundt. A thinner glaze would have worked better but I had to choose one that hardened to avoid transport issues.
Unfortunately, I do not have a photo with the inside as it was not cut by me but I will repeat this process with a future cake for you to see.

Happy birthday, my little bunny! I do not know when these years have passed since you arrived in this world, but you brought so much happiness and joy into our lives!

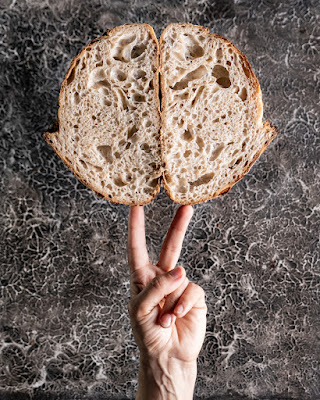
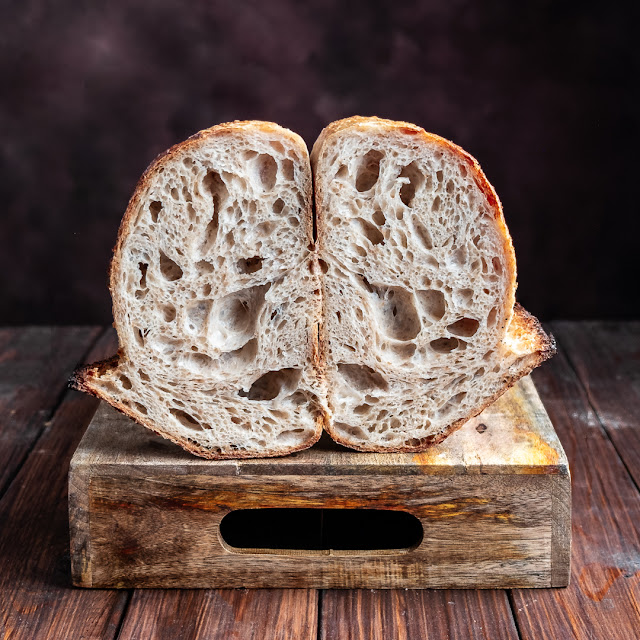
What is the deal with Open Crumb Sourdough Bread?


Open crumb is a dream for any baker for its imposing outside and inside look. 

It is a wish for a professional baker, as bigger loaves are quickly sold. 
Open crumb is a pride for a home baker, prooving high baking skills and mastering the fermentation process.

But open crumb is not just about the look. 
Pushing fermentation to the maximum means that the sugars in the dough are more consumed turning the bread less caloric. This means healthier bread.
When I started making sourdough bread I wished I had all the details to understand how it works. It took me many years to practice and observe the dough. It took me many books to read, articles or posts to digest or videos to watch. The trick in all this way was to pay attention and learn from my own experience.
I have never followed a baking school, everything I know is self-learning. There are many materials out there to learn from, free or paid, covering from the basic to the most scientific explanations. But the most important is to practice what others say and develop your own baking skills.

What I love the most about sourdough baking is that you never feel you master it completely and there is always something new to learn from every bake. Unfortunately, is not that simple to follow exactly a recipe, you need to learn to read plenty of signs that recipes do not mention. You need to develop a feeling for the dough. This happens with your eyes and with your hands.
On the way, you need to understand WHY every step is done and what it brings. Otherwise, why do it?

Open crumb was and still is for me a challenge. The truth is that I do not chase it every time. There are other types of bread catching my attention too from different perspectives. But open crumb is about perfecting the fermentation which is the most important in the sourdough baking process.
It is the jewel of a baker although I know many who will not make or buy an open crumb but a more dense one.

I tried to gather in this video all my lessons learned and share them with you. I hope that you take a shorter way to perfect open crumb than I took, and I offer you what I wish I had known 8 years ago when I started baking sourdough bread for me and my family.

However, this is not the bread to spread butter on.  Pick rather a sandwich loaf.

It is instead the perfect bread to accompany a soup or another dish.


Here is my conclusion gathered in a list of SECRETS for achieving open crumb:
     1. Use stronger bread flour
     2. Use a healthy sourdough starter
     3. Use higher dough hydration (>70%)
     4. Develop a strong gluten network
     5. Extend the fermentation to the maximum without over fermenting
     6. Learn how to read the dough
     7. Improve your dough handling skills
     8. Use steam for baking

Rum Raisins Mini Cakes


The reason why alcoholic drinks go into cakes is mainly for aroma. Do not worry about alcohol, it will just evaporate during baking so it is fully safe to give these cakes to your kids or to eat them before driving.
When it comes to rum, my mind goes to pirates. I am not a big fan of this drink but I love the aroma. For cakes, you can use rum essence in general which is much more concentrated in terms of flavours but the drink itself can go as well. Rum and raisins are an undisputable match, both the taste and flavours go so well together.

This is a simple cake and I noticed that it match better small moulds, rather than big ones. It has a tendency to retract a bit when cooling no matter the baking time. They go well in cupcakes, mini cakes or bundtlettes moulds. However, the taste and texture are just perfect and I invite you to try it...