


I make just a few anniversary cakes yearly, but when I do them, I want to be remembered.
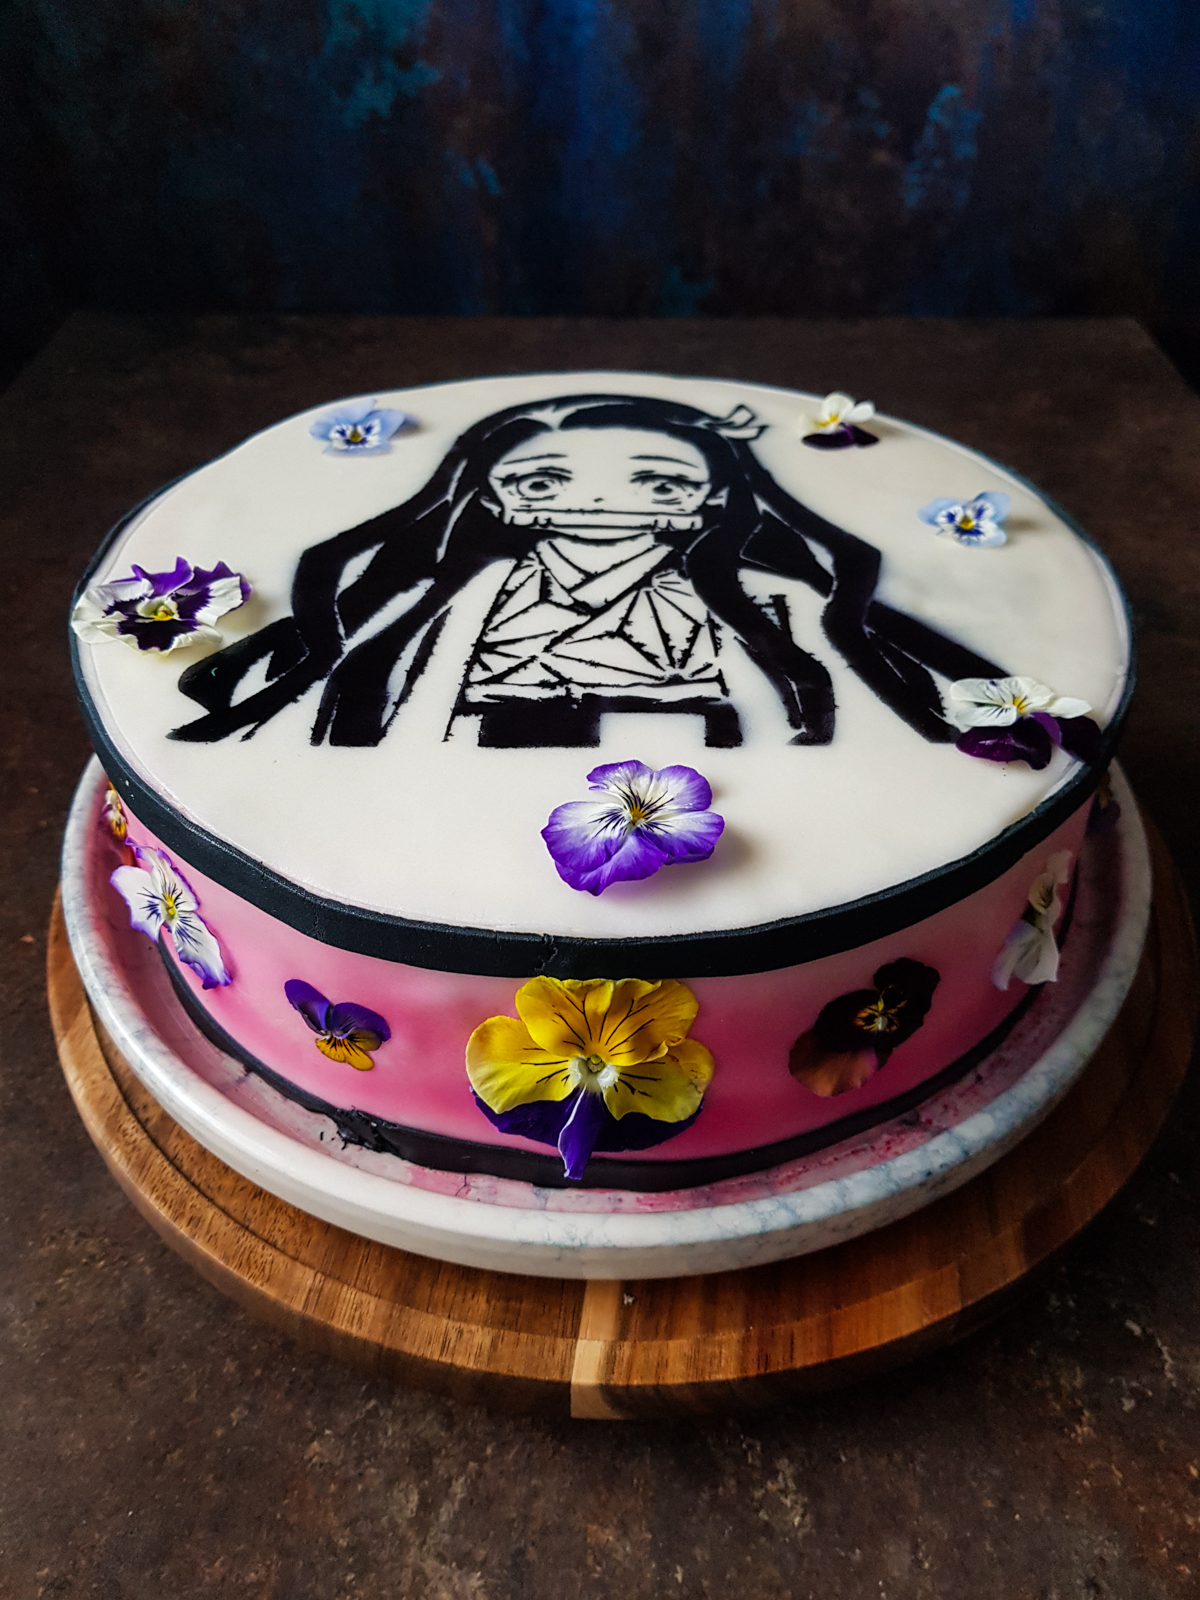
This weekend we celebrated the 11th anniversary of my daughter. At this age, doll cakes are not in fashion anymore, so I followed her taste. Nezuko is her favourite character, so you can imagine that the cake should have been related.
Luckily, her mother bought a plotter recently, so making stencils was a piece of cake (or should have been...). Her mother also added to her tools collection a cake airbrush for this occasion. I can only conclude that, me, as her mother, sometimes I challenge myself maybe too far. But in the end, for my first stencilled cake, it doesn't look that bad. The most important thing was achieved, my daughter was very proud of her anniversary cake and me, in this way I achieved my goal, to make a cake to be remembered.
Ingredients:
Cocoa sponge cake:
- 400g eggs (about 8 pieces)
- 223g flour (sifted)
- 30g cocoa powder (sifted)
- 200g sugar (divided into 150g + 50g)
- 1 tablespoon rum essence
- half a lemon juice
- 6g baking powder (optional)
- 1 tablespoon baking soda
Filling (Swiss buttercream):
- 5 egg whites
- 400g lactose free butter (at least 80% fat)
- 250g sugar
Syrup:
Decoration:
Directions:- 200g water
- 1 tablespoon of rum essence
Decoration:
- 250g sugar paste
- food colourants to be used for stencilling
- edible flowers (optional)
Sponge:
Filling:
Assembling of the cake:
Decoration:

- Prepare first the sponge cake. Prepare the pans: brush with olive oil and sprinkle flour or cocoa powder over. This step is essential in order to easily get the cake out of the pan after baking (and in one piece). If you prefer, you can use parchment paper to avoid sticking.
- Preheat the oven to 180ºC.
- In a bowl, mix the flour with baking powder. Baking powder is optional but if you want to be sure that your cake will not fail, I suggest using it.
- With the help of a stand/hand mixer beat the egg whites until foam. Add the 150g of sugar in steps and continue to beat until dissolved and the meringue looks glossy and forms peaks. It takes about 7 minutes with the mixer turned on to the maximum speed.
One note, measuring the egg weight while separating the yolks from whites can be tricky. Either you use 2 kitchen balances or you break them into a bowl that you weigh and remove the yolks with your fingers (this is a risky version). Alternatively, you measure the eggs with the shell and subtract the empty shells' weight in the end, although it will be tricky to balance back the quantity if you get over. Your choice, however, try to stay in the quantity of eggs with +/- 2%, otherwise, the cake might change its texture. - In parallel, or after the previous step, beat the egg yolks in another bowl with lemon juice, the vanilla essence and the remaining 50g of sugar. Mix on a high speed for 10 minutes. Sprinkle the cocoa over in several steps and mix at the slowest speed until well combined. You can do this step in parallel with the previous one if you have 2 mixers. I did the egg whites in the standing mixer and the yolks with a hand mixer. This minimises the loss of bubbles from the meringue until you finish the yolks.
- Combine the 2 compositions + the flour mixture in the following way: add 1/3 of the yolks over the meringue, then 1 tablespoon of flour on top. Stir 2-3 times with a spatula using up and down movements. Repeat 2 more times until you finish the egg yolks. Continue with the remaining flour mixture, adding one spoon at a time and stirring maximum 2-3 times with the spatula after. You need to minimise the stirs while ensuring that all ingredients are well combined. The composition will deflate a bit but it should still remain foamy.
- Pour this composition into the pan. On the top, spread it more to the sides as in the middle the cake will raise much more than on the sides.
- Put the pan into the oven and bake it at 180ºC for 45 minutes. In the end, test it with a wooden stick (toothpick) to be sure it gets out of the cake clean.
- Let the cake cool in the pan until you feel comfortable touching it, without feeling burned. That would take about 15-20 minutes. You can prepare this the day before and let it sit in the fridge over night.
- Revert the pan on a rack and let it cool completely.
- Put the egg whites and sugar in a bowl that is heat resistant because you'll need to put them later on a bain-marie. I use the stainless steel bowl of the mixer that I put over a pan on which I added some water. The water in the pan should not touch the bowl with the eggs and sugar.
- Turn on the heating for this bain-marie system and mix the eggs with a whisk. The composition needs to reach 70ºC and in the meantime, the sugar will be already dissolved. Use a food thermometer to measure the temperature of the eggs.
- Then, remove the bowl from the hot pan and put it under the mixer. Turn it on at a high speed and let it make the meringue for a few minutes of mixing.
- When the meringue is stiff, we'll need to add the butter, spoon by spoon, or piece by piece while continuing to mix. During the mixing, the temperature of the eggs is lowering but as I used the same metallic mixing bowl, the meringue will be ready before the egg whites arrive at the room temperature. I use then the butter that was taken out from the fridge just 10-15 minutes before (when I started the cream). But if you use another mixing bowl and your meringue arrived to room temperature when mixed then is better to use the butter at room temperature not cold from the fridge. The butter needs to be added cube by cube (let's say of 2cm size) or spoon by spoon depending on its form. What is happening when you add the butter is that the meringue will lose its nice stiff shape, but just continue to mix as it will come back. If it doesn't (because maybe your butter or meringue was too warm), put your bowl in the fridge for a few minutes, and restart the mixing. Ideally, if both meringue and butter are at room temperature the cream gets very nice.
- When the cream got stiff again, I split it into 2, because on one part I added the raspberry sauce. The one with raspberry was meant to sit between the cake layers while the white one to sit on the borders and top. The point was that the sugar paste may be a bit transparent when put on top of the cake and if you have a pink buttercream under then your cake might not look pure white.
- Prepare the syrup by mixing the water with the rum essence. Stir until well combined.
- Layer the cake in the following way:
- Put one layer of sponge cake.
- Add 1/3 of the syrup over, using a spoon.
- Spread 1/4 of the buttercream over
- Place the frozen raspberries in circles over the buttercream and push them inside.
- Repeat the same with the next 2 slices
- The remaining buttercream is spread on the sides. Smooth it with a spatula or a knife until you get a nice shape.
- When finished, place the cake in the fridge and start preparing the decoration.
- Stretch the sugar paste into a super fine layer. Make a circle for the top and a band for the borders and apply them on the top and sides of the cake. There are also 2 black stripes made from sugar paste.
- Airbrush the sides with pink colourant.
- Put the stencil on top of the cake and airbush with black food paint.
- Apply pansies for a beautiful look.


0 comments:
Post a Comment